If there weren't so many panels on the C14 I would have painted mine a little while ago, although it would be hard to go a day or two without riding it.

Here's a bit of advice as someone from the industry having both worked in shops as well as currently managing a paint store.
If you're looking to DIY here is my advice to you on products (note there are many brands out there, and for a project like this, paint IS paint relatively speaking, do not get too caught up in brand.)
-Single stage finish-
If you're looking at doing a single stage DO NOT do it for the sole factor of it being easier (one step) The reason I say this is most people will generally pick a metallic or pearlescent color, and when spraying a single stage they are considerably harder to get the color to lay out correctly while getting a nice finish. If you're seasoned painter or had your hands dirty with paint a few times it may be easier but if you're just starting out unless its a plain 'ol solid color, just go base/clear. In my store I had my assistant (who has no spraying experience) spray a panel with the same blue metallic color code in both a Single stage and a base/clear as a display for us to help demonstrate the difference between the two. You'd find that the pearl/metallic lay out much better in the base as well as there was considerably less orange peel in the BC.
-Base/Clear-
Really this is the all around best and easiest option to spray regardless of skill level. If you're using a color that has a high concentration of metallic or pearl it is a LOT easier to get good metallic orientation and keep striping and mottling to a minimum. While it does cost a little more, from my experience of quoting and selling the two a
comparable base/clear and metallic will not be too terribly different. As for the Base/clear if you're painting the whole bike or vehicle you can generally use a cheaper basecoat system (such as Omni (PPG), Dimension (SW), Nason (Dupont) etc). The main difference between the lower/mid level paint lines and the premium lines of paint within the brands is a LOT of money. The reason the premium lines cost a lot more is they have considerably better color match for a bodyshop to use day in day out for small repairs. For the lines I just mentioned they are what we would call a "jamb match", and the theory of this is if you're painting the whole car the color will be close enough you wont notice a difference to the door jambs. So in other words if you're doing a full paintjob save the money, you aren't buying a much better product itself, if anything spend extra on the clear and get a nice high solids clear.
One other note on BC:
Looking through this thread Ive seen numerous mentions of spray cans being used to paint bikes and I thought I'd touch on this a bit (I sell them all day long to DIY'ers) I'd avoid using a single stage as generally ive never seen them hold as high of a gloss level coming out of an aerosol. The basecoat works just fine in a spray can often times however the most important thing I could recommend on using spray cans is using a NICE CLEAR. I would highly highly HIGHLY recommend you use a 2k spraycan (Spraymax for example), and here are the reasons.
1) It holds a MUCH higher gloss level over time than a non catalyzed can
2) The downside of using an air dry clear without a chemical catalyst is that it never gets the chemical kick- if you get a solvent on the paint to sit on it for a little while it can WASH the paint right off. The reason I like to point this out is if you paint your gas tank, you are really risking a lot of trouble because I don't know about you guys but I do get just a little gas spilling onto the tank when i fill up quite often! - I've actually had people come back to my store after this has happened)
The spraymax cans are about $20 bucks/can and trust me, I know you can find oddball spray cans of clear for $5 at whatever store, but you would be very dissapointed if you saw the difference between the two sprayed out.
Here is another tip on those of you doing some sort of design and why you'll love base/clear:
My old vulcan 900 shortly before I sold it

I did the ghost flames in the same candy green as the rest of the bike (gets darker the more that is applied). So obviously with another extra two coats of color there is going to be a little bit of a bump in the paint even after you clear it. The nice thing on base/clear is you can sand it back down with 800/1000 and sand a lot of the transition edge out and then reclear it like I did on this bike. It'll make the edge invisible and give you a show finish (that's what many guys will do when spraying a show car) So if you're doing decals, stripes, color breaks mid-panel etc its a very nice thing to do to make it look better than OEM.
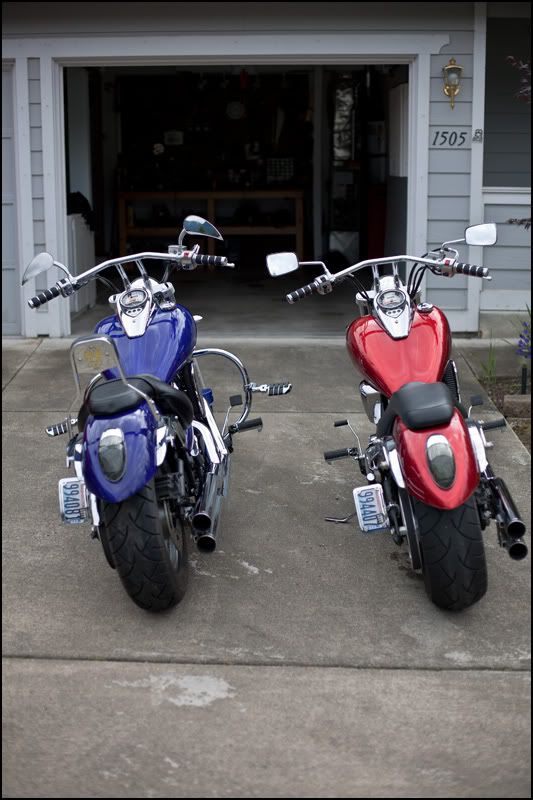
Here is the bike before it was green after I shot it red alongside my dad's which I also sprayed. Note both bikes had the tanks and fenders cut and recleared and from back here you can't even make the flames out on the red and the blue you can only see see the reflection of them but no outline.
Alright, well I'm done rambling for now. If anyone wants some honest help from someone who sells paint to DIY folks as well as sprayed a lot of motorcycles (or even the same one many times
) feel free to post questions and/or shoot me a PM, not trying to thread jack lol.


